TL;DR (Quick Summary)
Problem: Vercel/Netlify can be blocked or unreliable in certain regions. No good self-hosted alternatives exist yet.
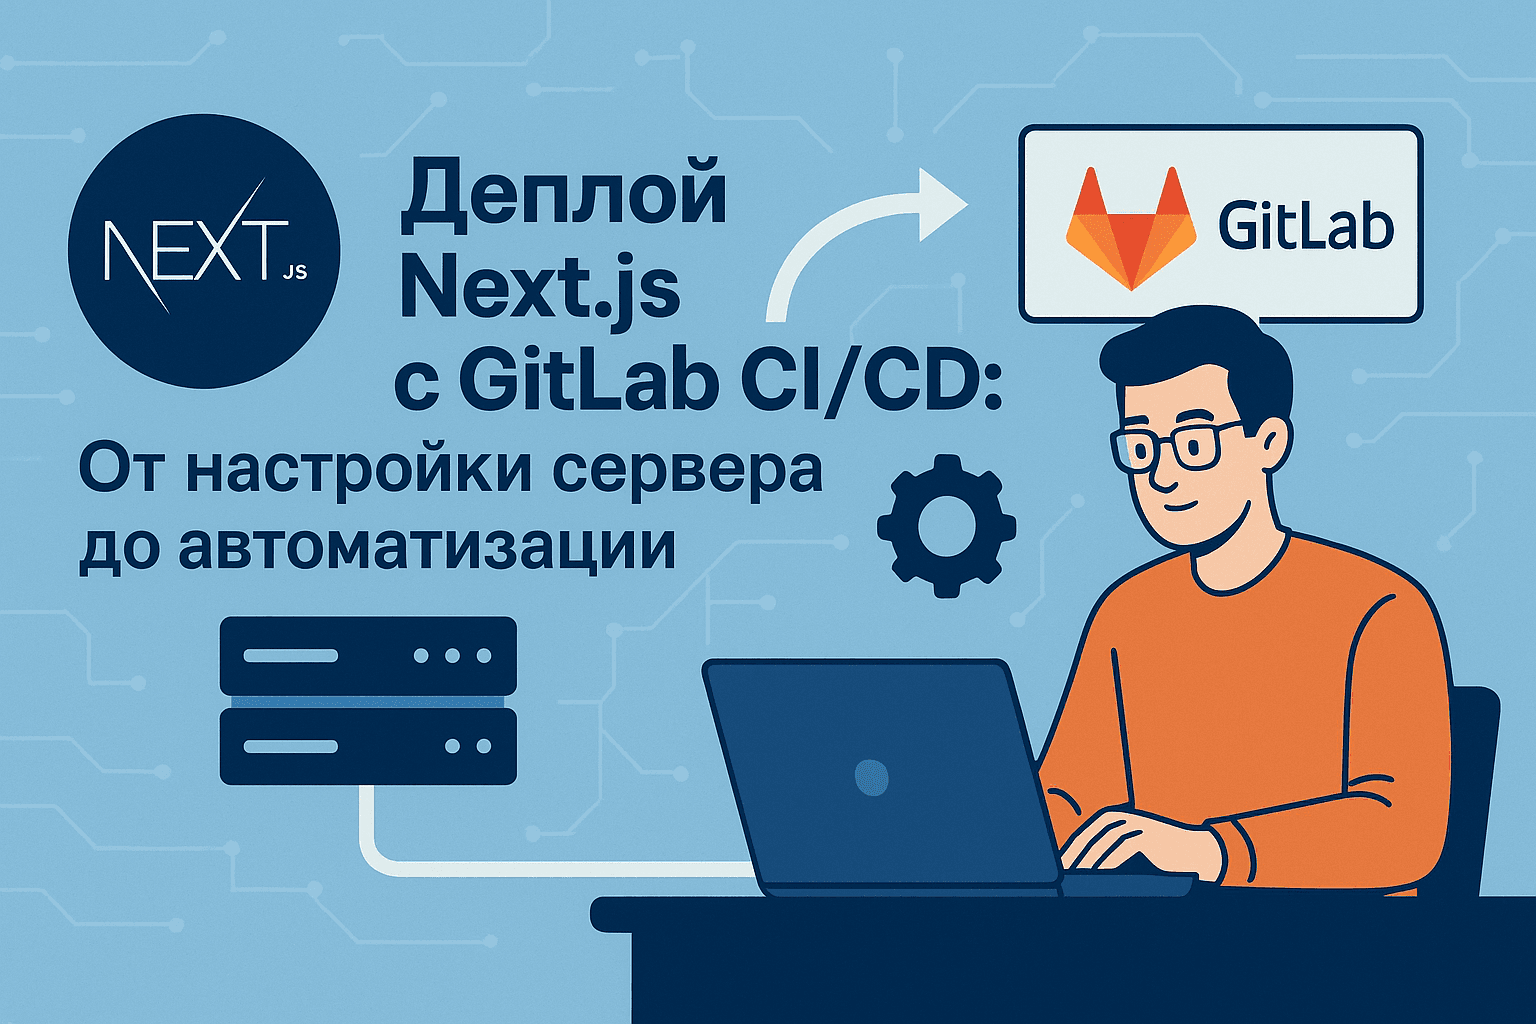
Solution: Self-hosted deployment on your own server via GitLab CI/CD.
What you'll get:
- Automatic deployment on push to GitLab
- Zero-downtime via PM2 cluster mode
- SSL out of the box via Nginx Proxy Manager
- Multiple domains management on a single IP
- Full control and predictable costs
Minimal setup for hobby projects:
GitLab CI → git pull → npm ci → npm run build → PM2 reload → doneFull production stack:
- Backups + Health checks + Monitoring + Rollback + Multi-environment
Alternatives: Coolify, Dokploy, CapRover (if you don't want to configure manually).
Setup time: 1-2 hours for basic setup, 4-6 hours for full stack.
Introduction
In 2025, many developers choose self-hosted deployment instead of PaaS solutions like Vercel or Netlify. This is especially relevant for developers in regions with restricted access to US services.
Why self-hosted instead of Vercel/Netlify?
-
Service blocking — Vercel, Netlify, and other American platforms can be blocked or work unstably in certain regions. This is critical for production applications.
-
No local alternatives — Full-featured local alternatives to Vercel don't exist yet (or I don't know about them). Existing platforms are either more expensive or don't provide the same level of convenience.
-
Full control — Your infrastructure, your rules. No sudden pricing changes, limits, or blocks.
-
Predictable costs — Fixed VPS price vs. pay-per-use with unexpected bills during traffic spikes.
-
Flexibility — You can configure the environment for your needs: custom Node.js versions, system dependencies, corporate infrastructure integration.
Disadvantages:
- Time required for setup and maintenance
- Responsibility for security and updates
- Need to understand DevOps practices
Real-world example: This personal website (potapov.me) works exactly using the scheme described below — GitLab CI/CD + own server + PM2 + Nginx Proxy Manager. Everything is stable, fast, and under full control.
Disclaimer: This article describes an ideal case with a full set of practices (monitoring, alerts, health checks, rollback, etc.). On my hobby project, I haven't implemented all these features — I don't want to spend too many resources maintaining a personal website.
I use a basic setup: GitLab CI → git pull on server → npm ci → npm run build → PM2 reload → done. This is enough for a hobby project. But if you're building a production application for business or clients, the described practices will help you build reliable infrastructure.
Use this article as a checklist and implement only what you need.
In this article, I'll show you how to set up a reliable CI/CD pipeline for a Next.js application based on GitLab CI, which will provide:
- Zero-downtime deployment via PM2 cluster mode
- Multi-environment setup (staging/production)
- Secure secrets management via GitLab Variables
- Automatic rollback on errors
- Monitoring and alerts for status control
- Dependency caching to speed up builds
Solution Architecture
System Components
┌─────────────┐      ┌──────────────┐      ┌──────────────────────┐
│   GitLab    │─────▶│ GitLab Runner│─────▶│   Server Cluster     │
│ (Git + CI)  │      │   (Build)    │      │                      │
└─────────────┘      └──────────────┘      │ ┌────────────────┐   │
      │                                    │ │ Nginx Proxy    │   │
      │ 1. Push code                       │ │ Manager (NPM)  │   │
      │ 2. Trigger pipeline                │ └────────┬───────┘   │
      │ 3. Build & test                    │          │           │
      │ 4. Deploy via SSH ─────────────────┼──────────┤           │
      │ 5. Health check                    │ ┌────────▼───────┐   │
      │ 6. Rollback if needed              │ │  Next.js App   │   │
      │                                    │ │  (PM2 Cluster) │   │
      │                                    │ └────────────────┘   │
      └────────────────────────────────────┴──────────────────────┘
                                              1 External IP
                                              Multiple Apps/Servers
Why this stack?
- GitLab CI — built into GitLab, free for self-hosted, powerful YAML DSL
- PM2 — production process manager with cluster mode for zero-downtime reload
- Nginx Proxy Manager — convenient web interface for managing reverse proxy, SSL certificates, and multiple domains on one IP
- Ubuntu 24.04 — LTS release with long-term support
Why Nginx Proxy Manager instead of plain Nginx?
If you have one external IP address and multiple servers/applications (like my case — a whole cluster), managing through Nginx configs becomes inconvenient. Nginx Proxy Manager (NPM) solves this:
- Web interface for domain and proxy management
- Automatic SSL certificates via Let's Encrypt
- Easy addition of new domains without editing configs
- Support for proxy hosts, streams, redirects
- Access lists and bot protection out of the box
For simple cases (1 server, 1 domain), you can use plain Nginx — the principles are the same.
Deployment Workflow
- Developer pushes code to
mainordevelopbranch - GitLab CI runs pipeline:
- Install — install dependencies with caching
- Lint — code checking (ESLint, TypeScript)
- Test — run tests (optional)
- Build — production Next.js build
- Deploy — deploy to server via SSH
- Server receives new code and:
- Backs up current version
- Installs dependencies
- Builds application (or copies artifact)
- Executes
pm2 reloadfor zero-downtime restart - Checks health endpoint
- Rollback automatically executes on errors
Part 1: Server Preparation
Hardware Requirements
For comfortable Next.js application operation, I recommend:
- CPU: 2 vCPU (minimum 1 vCPU, but build will be slow)
- RAM: 2 GB (minimum 1 GB + 2 GB swap for build)
- Disk: 20 GB SSD (10 GB minimum for code, node_modules, .next, logs)
- OS: Ubuntu 24.04 LTS
- Network:
- Incoming: 22 (SSH), 80 (HTTP), 443 (HTTPS)
- Outgoing: 443 (npm, git, certbot)
Important: If you have less than 2 GB RAM, definitely configure at least 2 GB swap. Next.js build with Turbopack is memory-intensive.
Step 1: Basic Server Setup and Security
Connect to server via SSH and update the system:
# System update
sudo apt update && sudo apt upgrade -y

# Install basic packages
sudo apt install -y git curl ufw fail2ban build-essential

# Firewall setup
sudo ufw allow OpenSSH
sudo ufw allow 'Nginx Full'
sudo ufw enable
sudo ufw status
SSH Hardening (Security Enhancement)
Important for production: These settings will protect your server from unauthorized access. Configure before exposing the server to the internet.
# 1. Create SSH key on local machine (if you don't have one yet)
# Run on LOCAL machine, not on server!
ssh-keygen -t ed25519 -C "your_email@example.com"

# 2. Copy public key to server
ssh-copy-id -i ~/.ssh/id_ed25519.pub user@your_server_ip

# 3. Verify you can login with key
ssh user@your_server_ip

# 4. Disable password login (SSH keys only)
sudo nano /etc/ssh/sshd_config

# Find and change these lines:
# PasswordAuthentication no
# PubkeyAuthentication yes
# PermitRootLogin no
# ChallengeResponseAuthentication no

# 5. Restart SSH
sudo systemctl restart sshd

# 6. DON'T CLOSE current session! Open new terminal window
# and verify you can login with key
Fail2Ban for Brute-force Protection
# Installation (already installed above)
sudo apt install -y fail2ban

# Create local configuration
sudo cp /etc/fail2ban/jail.conf /etc/fail2ban/jail.local

# Configure basic SSH protection
sudo tee /etc/fail2ban/jail.local << 'EOF'
[DEFAULT]
bantime = 1h
findtime = 10m
maxretry = 5
destemail = your_email@example.com
sendername = Fail2Ban

[sshd]
enabled = true
port = ssh
logpath = %(sshd_log)s
backend = %(sshd_backend)s
EOF

# Start Fail2Ban
sudo systemctl enable fail2ban
sudo systemctl start fail2ban

# Check status
sudo fail2ban-client status
sudo fail2ban-client status sshd
What Fail2Ban does:
- Analyzes SSH logs
- Bans IP for 1 hour after 5 failed login attempts in 10 minutes
- Protects against brute-force attacks
Firewall Configuration (UFW)
More detailed port configuration:
# Reset rules (if you need to start from scratch)
sudo ufw --force reset

# Default policy: deny all incoming, allow outgoing
sudo ufw default deny incoming
sudo ufw default allow outgoing

# Allow SSH (IMPORTANT: do this before enable!)
sudo ufw allow 22/tcp comment 'SSH'

# Allow HTTP/HTTPS for NPM or Nginx
sudo ufw allow 80/tcp comment 'HTTP'
sudo ufw allow 443/tcp comment 'HTTPS'

# If using NPM, allow admin panel (only for your IP!)
# sudo ufw allow from YOUR_IP to any port 81 comment 'NPM Admin'

# Rate limit SSH connections (DDoS protection)
sudo ufw limit 22/tcp

# Enable firewall
sudo ufw enable

# Check rules
sudo ufw status numbered
Caution! Before ufw enable make sure you allowed SSH port (22),
otherwise you'll lose server access!
Step 2: Installing Node.js 20 LTS
Next.js 15 requires Node.js >= 18.17, recommended 20 LTS:
# Install Node.js 20 via NodeSource
curl -fsSL https://deb.nodesource.com/setup_20.x | sudo -E bash -
sudo apt install -y nodejs

# Check versions
node -v  # should be >= v20.x
npm -v   # should be >= 10.x

# Configure npm for production
npm config set loglevel error
Alternative: You can use nvm (Node Version Manager) to manage Node.js
versions, especially if you need multiple versions on one server.
Step 3: PM2 Installation and Configuration
PM2 is a production process manager with cluster mode support for zero-downtime deployment.
# Install PM2 globally
sudo npm install -g pm2

# Configure PM2 autostart on reboot
pm2 startup systemd -u $USER --hp $HOME
# Command will output a string with sudo — execute it

# Check systemd service
sudo systemctl status pm2-$USER
Why PM2 instead of systemd directly?
- Cluster mode with automatic load balancing
- Graceful reload without downtime (smooth switching between instances)
- Built-in monitoring (CPU, RAM, logs)
- Automatic restart on crash
- Log rotation out of the box
- Simple API for process management
Step 4: Nginx Proxy Manager Setup
Nginx Proxy Manager (NPM) is a web interface for managing Nginx as a reverse proxy. Especially convenient when you have one external IP and multiple applications/servers.
Installation via Docker Compose
# Create directory for NPM
mkdir -p ~/nginx-proxy-manager
cd ~/nginx-proxy-manager

# Create docker-compose.yml
cat > docker-compose.yml << 'EOF'
version: '3.8'
services:
  app:
    image: 'jc21/nginx-proxy-manager:latest'
    restart: unless-stopped
    ports:
      - '80:80'     # HTTP
      - '443:443'   # HTTPS
      - '81:81'     # Admin UI
    volumes:
      - ./data:/data
      - ./letsencrypt:/etc/letsencrypt
    environment:
      DB_SQLITE_FILE: "/data/database.sqlite"
EOF

# Start NPM
docker-compose up -d

# Check status
docker-compose ps
Initial Setup
- Open
http://YOUR_SERVER_IP:81in browser - Login with default credentials:
- Email:
admin@example.com - Password:
changeme
- Email:
- Change email and password on first login
Adding Proxy Host for Next.js
In NPM web interface:
-
Hosts → Proxy Hosts → Add Proxy Host
-
Details tab:
- Domain Names:
potapov.me,www.potapov.me - Scheme:
http - Forward Hostname / IP:
localhost(or Next.js server IP) - Forward Port:
3000 - ✅ Cache Assets
- ✅ Block Common Exploits
- ✅ Websockets Support
- Domain Names:
-
SSL tab:
- ✅ SSL Certificate: Request a new SSL Certificate
- ✅ Force SSL
- ✅ HTTP/2 Support
- ✅ HSTS Enabled
- Email: your email for Let's Encrypt
- ✅ I Agree to the Let's Encrypt Terms of Service
-
Advanced (optional):
# Custom settings for Next.js
location /_next/static/ {
    proxy_cache_valid 200 60m;
    add_header Cache-Control "public, immutable";
}

location /api/health {
    access_log off;
}

# Timeouts for SSR
proxy_read_timeout 60s;
proxy_connect_timeout 60s;- Save
NPM automatically:
- Configures reverse proxy to your application
- Obtains SSL certificate from Let's Encrypt
- Sets up automatic certificate renewal
- Enables HTTP to HTTPS redirect
NPM advantages in my case:
I have one external IP address and a whole cluster of servers with different applications. NPM allows:
- Manage all domains from one place
- Add new applications in a minute via UI
- Don't edit configs manually
- Automatically manage SSL for all domains
- Configure access lists, rate limiting, redirects
If you have a simple configuration (1 server, 1-2 domains), you can use plain Nginx — the proxying principles are the same.
Alternative: Plain Nginx
If you prefer classic Nginx, example configuration:
# /etc/nginx/sites-available/potapov.me
server {
    listen 80;
    server_name potapov.me www.potapov.me;

    location / {
        proxy_pass http://localhost:3000;
        proxy_http_version 1.1;
        proxy_set_header Upgrade $http_upgrade;
        proxy_set_header Connection 'upgrade';
        proxy_set_header Host $host;
        proxy_set_header X-Real-IP $remote_addr;
        proxy_set_header X-Forwarded-For $proxy_add_x_forwarded_for;
        proxy_set_header X-Forwarded-Proto $scheme;
        proxy_cache_bypass $http_upgrade;
        proxy_read_timeout 60s;
    }
}
Then use Certbot for SSL:
sudo certbot --nginx -d potapov.me -d www.potapov.meStep 5: Creating Directory Structure
# Create application directory
sudo mkdir -p /var/www/potapov.me
sudo chown -R $USER:$USER /var/www/potapov.me

# Create directories for logs and backups
mkdir -p /var/www/potapov.me/{logs,backups}

# Create .env file (will fill via GitLab CI later)
touch /var/www/potapov.me/.env
Part 2: PM2 Ecosystem Configuration
PM2 Ecosystem file is a configuration for managing the application in production.
Ecosystem file is stored in the repository and defines startup parameters: number of instances, environment variables, log paths, memory limits, etc.
Create ecosystem.config.cjs in project root:
// ecosystem.config.cjs
module.exports = {
  apps: [
    {
      name: "potapov-me",
      cwd: "/var/www/potapov.me",
      script: "node_modules/next/dist/bin/next",
      args: "start -p 3000",

      // Environment variables
      env: {
        NODE_ENV: "production",
        PORT: 3000,
      },

      // Cluster mode for zero-downtime reload
      exec_mode: "cluster",
      instances: 2, // or 'max' to use all CPU cores

      // Auto-restart settings
      autorestart: true,
      max_restarts: 10,
      min_uptime: "10s",
      max_memory_restart: "500M", // Restart on memory limit

      // Logging
      out_file: "./logs/pm2-out.log",
      error_file: "./logs/pm2-error.log",
      log_date_format: "YYYY-MM-DD HH:mm:ss Z",
      merge_logs: true,

      // Graceful shutdown
      kill_timeout: 5000,
      wait_ready: true,
      listen_timeout: 10000,
    },
  ],
};
Key parameters:
exec_mode: 'cluster'— run multiple instances for balancing and zero-downtime reloadinstances: 2— number of processes (recommended 2-4 for typical VPS)max_memory_restart— automatic restart on memory leakswait_ready— wait for ready signal from application (requiresprocess.send('ready')in code)kill_timeout— time for graceful shutdown (finishing current requests)
Pro tip: For Next.js in production mode, 2-4 instances are enough. More isn't always better, especially on low-resource VPS.
Adding Health Check Endpoint
Create API route for application health check:
// app/api/health/route.ts
import { NextResponse } from "next/server";

export async function GET() {
  const health = {
    status: "ok",
    timestamp: new Date().toISOString(),
    uptime: process.uptime(),
    environment: process.env.NODE_ENV,
  };

  return NextResponse.json(health, { status: 200 });
}
This endpoint is used for:
- Availability check after deployment
- Monitoring via external services (UptimeRobot, Pingdom)
- Load balancer health checks
Part 3: GitLab CI/CD Pipeline
Now let's set up automatic deployment via GitLab CI.
CI/CD Architecture
GitLab CI uses Runners — agents that execute pipeline tasks. Types:
- Shared Runners — provided by GitLab.com for free (400 minutes/month limit)
- Specific Runners — your own runner on any server
- Group/Project Runners — for a group of projects or specific repository
For this guide, we'll use Shared Runners from GitLab.com for building and deploy to your server via SSH. If you need more control — set up a Specific Runner on your server.
Step 1: SSH Access Setup for CI
GitLab CI will connect to the server via SSH for deployment. Let's configure SSH keys:
# On server: create deploy user (optional)
sudo adduser deployer
sudo usermod -aG sudo deployer

# Add to sudoers for commands without password (if needed)
# For NPM usually not required as it works via Docker
# For plain Nginx:
# echo "deployer ALL=(ALL) NOPASSWD: /usr/bin/systemctl reload nginx, /usr/bin/pm2" | sudo tee /etc/sudoers.d/deployer

# Switch to deployer
su - deployer

# Create SSH keys (on local machine or in GitLab CI/CD Settings)
ssh-keygen -t ed25519 -C "gitlab-ci@potapov.me" -f ~/.ssh/gitlab_ci_ed25519

# Copy public key to server
# On server (under deployer):
mkdir -p ~/.ssh
chmod 700 ~/.ssh
nano ~/.ssh/authorized_keys
# Paste contents of gitlab_ci_ed25519.pub
chmod 600 ~/.ssh/authorized_keys
Step 2: Adding Secrets to GitLab
Go to GitLab: Settings → CI/CD → Variables and add:
| Key | Value | Protected | Masked |
|---|---|---|---|
SSH_PRIVATE_KEY | Contents of gitlab_ci_ed25519 | ✅ | ✅ |
SSH_HOST | Server IP or domain | ✅ | ❌ |
SSH_USER | deployer | ✅ | ❌ |
DEPLOY_PATH | /var/www/potapov.me | ❌ | ❌ |
NODE_ENV | production | ❌ | ❌ |
Security: Enable "Protected" for production variables (available only in protected branches) and "Masked" for secrets (not shown in logs).
Step 3: Creating .gitlab-ci.yml
Create .gitlab-ci.yml file in project root:
# .gitlab-ci.yml
# GitLab CI/CD pipeline for Next.js deployment

# Global settings
image: node:20-alpine

# Pipeline stages
stages:
  - install
  - lint
  - test
  - build
  - deploy
  - healthcheck
  - rollback

# Cache node_modules for speedup
cache:
  key:
    files:
      - package-lock.json
  paths:
    - node_modules/
    - .npm/

# Environment variables
variables:
  npm_config_cache: "$CI_PROJECT_DIR/.npm"
  NEXT_TELEMETRY_DISABLED: "1"

# Template for Node.js jobs
.node_job:
  before_script:
    - node -v
    - npm -v

# === STAGE: Install Dependencies ===
install_dependencies:
  extends: .node_job
  stage: install
  script:
    - echo "Installing dependencies..."
    - npm ci --prefer-offline --no-audit
  artifacts:
    paths:
      - node_modules/
    expire_in: 1 hour
  only:
    - main
    - develop
    - merge_requests

# === STAGE: Lint ===
lint:
  extends: .node_job
  stage: lint
  dependencies:
    - install_dependencies
  script:
    - echo "Running ESLint..."
    - npm run lint
  only:
    - main
    - develop
    - merge_requests

# === STAGE: Build ===
build:
  extends: .node_job
  stage: build
  dependencies:
    - install_dependencies
  script:
    - echo "Building Next.js application..."
    - npm run build
  artifacts:
    paths:
      - .next/
      - public/
    expire_in: 1 hour
  only:
    - main
    - develop

# === STAGE: Deploy to Production ===
deploy_production:
  stage: deploy
  image: alpine:latest
  dependencies:
    - build
  before_script:
    # Install SSH client
    - apk add --no-cache openssh-client bash git

    # Setup SSH
    - eval $(ssh-agent -s)
    - echo "$SSH_PRIVATE_KEY" | tr -d '\r' | ssh-add -
    - mkdir -p ~/.ssh
    - chmod 700 ~/.ssh
    - ssh-keyscan -H $SSH_HOST >> ~/.ssh/known_hosts
    - chmod 644 ~/.ssh/known_hosts

  script:
    - echo "Deploying to production server..."

    # Create backup of current version
    - |
      ssh $SSH_USER@$SSH_HOST "
        cd $DEPLOY_PATH &&
        if [ -d .next ]; then
          echo 'Creating backup...' &&
          BACKUP_NAME=backup-\$(date +%Y%m%d-%H%M%S) &&
          mkdir -p backups &&
          tar -czf backups/\$BACKUP_NAME.tar.gz .next package.json package-lock.json &&
          echo 'Backup created: '\$BACKUP_NAME &&

          # Keep only last 5 backups
          cd backups &&
          ls -t | tail -n +6 | xargs -r rm &&
          cd ..
        fi
      "

    # Deploy via git pull on server
    - echo "Deploying via git pull..."
    - |
      ssh $SSH_USER@$SSH_HOST "
        cd $DEPLOY_PATH &&
        git fetch origin &&
        git reset --hard origin/main &&
        echo 'Code updated from git'
      "

    # Install dependencies, build and reload PM2
    - |
      ssh $SSH_USER@$SSH_HOST "
        cd $DEPLOY_PATH &&
        echo 'Installing dependencies...' &&
        npm ci --prefer-offline &&

        echo 'Building application...' &&
        npm run build &&

        echo 'Reloading PM2...' &&
        pm2 reload ecosystem.config.cjs --update-env &&

        echo 'Waiting for app to start...' &&
        sleep 5 &&

        pm2 status
      "

    - echo "Deployment completed successfully!"

  environment:
    name: production
    url: https://potapov.me

  only:
    - main

# === STAGE: Health Check ===
healthcheck_production:
  stage: healthcheck
  image: alpine:latest
  needs: ["deploy_production"]
  before_script:
    - apk add --no-cache curl

  script:
    - echo "Checking application health..."
    - |
      for i in {1..10}; do
        if curl -f -s https://potapov.me/api/health > /dev/null; then
          echo "✅ Health check passed!"
          exit 0
        else
          echo "⏳ Waiting for app to be ready (attempt $i/10)..."
          sleep 5
        fi
      done
      echo "❌ Health check failed after 10 attempts"
      exit 1

  dependencies:
    - deploy_production

  only:
    - main

# === STAGE: Rollback (manual) ===
rollback_production:
  stage: rollback
  image: alpine:latest
  before_script:
    - apk add --no-cache openssh-client
    - eval $(ssh-agent -s)
    - echo "$SSH_PRIVATE_KEY" | tr -d '\r' | ssh-add -
    - mkdir -p ~/.ssh
    - ssh-keyscan -H $SSH_HOST >> ~/.ssh/known_hosts

  script:
    - echo "Rolling back to previous version..."
    - |
      ssh $SSH_USER@$SSH_HOST "
        cd $DEPLOY_PATH &&

        # Find latest backup
        LATEST_BACKUP=\$(ls -t backups/*.tar.gz | head -1) &&

        if [ -z \"\$LATEST_BACKUP\" ]; then
          echo '❌ No backups found!'
          exit 1
        fi &&

        echo 'Restoring from backup: '\$LATEST_BACKUP &&

        # Restore from backup
        tar -xzf \$LATEST_BACKUP &&

        # Reload PM2
        pm2 reload ecosystem.config.cjs &&

        echo '✅ Rollback completed!'
      "

  when: manual
  only:
    - main
What this pipeline does:
- Install — installs dependencies with caching for faster subsequent runs
- Lint — checks code for style errors
- Build — builds Next.js application and saves artifacts
- Deploy — connects via SSH, creates backup, pulls code via git, installs dependencies, builds, restarts PM2
- Health Check — verifies application availability via /api/health
- Rollback — manual stage to rollback to previous version from backup
Alternatives and Extensions
The GitLab CI + PM2 + NPM stack described in the article is not the only option. Here are several alternatives for different scenarios:
Nginx Proxy Manager Alternatives
Traefik
Traefik — modern reverse proxy with automatic configuration via Docker labels.
Advantages:
- Automatic service discovery via Docker/Kubernetes
- Built-in Let's Encrypt
- Support for HTTP/2, HTTP/3, gRPC
- Powerful middleware system (rate limiting, authentication, etc.)
When to use: If you have microservices architecture with Docker/Kubernetes.
Caddy
Caddy — minimalist web server with automatic HTTPS.
Advantages:
- Automatic HTTPS out of the box (Let's Encrypt)
- Simplest configuration (Caddyfile)
- Built-in reverse proxy
Example configuration:
potapov.me {
    reverse_proxy localhost:3000
}
When to use: If you want the simplest setup without web interface.
All-in-One Solutions (Vercel Alternatives)
If you don't want to configure CI/CD manually, there are open-source "out of the box" platforms:
Coolify
Coolify — self-hosted alternative to Vercel/Netlify/Heroku.
What it can do:
- Git push to deploy (supports GitHub, GitLab, Bitbucket)
- Automatic SSL certificates
- Database management (PostgreSQL, MySQL, Redis, MongoDB)
- Automatic backups
- Built-in monitoring
- Web UI for management
Pros:
- 5-minute installation
- Supports Next.js, Node.js, PHP, Python, Ruby, Go, Rust
- Free and open-source
Cons:
- Requires more resources (Docker overhead)
- Less control over infrastructure
Installation:
curl -fsSL https://cdn.coollabs.io/coolify/install.sh | bashFrom personal experience: I tested Coolify six months ago (spring 2025). The concept is cool, UI is convenient, but the platform turned out to be very buggy and raw:
- Deployments periodically failed without clear errors
- Database crashed several times after updates
- Had to manually restart Docker containers
Maybe it's better now (active development), but I wouldn't risk it for critical projects yet. For experiments and non-critical services — you can try it.
CapRover
CapRover — PaaS platform for one-command application deployment.
Features:
- One-click apps (WordPress, Ghost, Grafana, etc.)
- Multi-server deployment
- Load balancing
- Automatic HTTPS
When to use: If you need to quickly deploy multiple applications on one server.
Dokploy
Dokploy — new open-source Vercel alternative (appeared in 2024).
What's interesting:
- Modern UI (similar to Vercel)
- Monorepo support
- Preview deployments for pull requests
- Edge functions
- Built-in analytics
Status: Active development, but can already be used in production.
GitHub: dokploy/dokploy
Selection Recommendations
| Scenario | Recommendation |
|---|---|
| Hobby project, 1-2 applications | Basic setup (GitLab CI + PM2 + NPM/Caddy) |
| Many applications on one server | Nginx Proxy Manager or Traefik |
| Want "like Vercel" but self-hosted | Coolify or Dokploy |
| Microservices with Docker | Traefik + Kubernetes/Docker Swarm |
| Maximum simplicity | CapRover |
| Full control and flexibility | Manual setup (this article) |
My choice for potapov.me: Basic setup without frills — GitLab CI, git pull, PM2, NPM. Works stably, doesn't require maintenance, enough for a hobby project.
For client projects I use Coolify — convenient to manage multiple applications through a single interface, clients can deploy themselves via Git push.
Troubleshooting
Common Problems and Solutions
1. PM2 Doesn't Start After Server Reboot
Symptoms: After reboot application doesn't work, pm2 status shows empty list.
Solution:
# Check PM2 systemd service status
systemctl status pm2-$USER

# If service not active, configure autostart
pm2 startup systemd -u $USER --hp $HOME
# Execute the sudo command that PM2 outputs

# Save current process list
pm2 save

# Test
sudo reboot
# After reboot check
pm2 status
2. GitLab CI Pipeline Fails with "Permission denied" on SSH
Symptoms:
Permission denied (publickey).
fatal: Could not read from remote repository.
Solution:
# 1. Check that SSH key is added to GitLab Variables
# Settings → CI/CD → Variables → SSH_PRIVATE_KEY

# 2. Make sure public key is added on server
cat ~/.ssh/authorized_keys

# 3. Check .ssh directory permissions
chmod 700 ~/.ssh
chmod 600 ~/.ssh/authorized_keys

# 4. Check SSH connection manually
ssh -i ~/.ssh/gitlab_ci_key user@server

# 5. Add -vvv for diagnostics
ssh -vvv user@server
3. Health Check Fails After Deployment
Symptoms: Pipeline fails on healthcheck stage.
Diagnostics:
# 1. Check that application is running
pm2 status
pm2 logs app-name --lines 50

# 2. Check if process is listening on the right port
sudo netstat -tlnp | grep 3000
# or
sudo lsof -i :3000

# 3. Check health endpoint locally
curl http://localhost:3000/api/health

# 4. Check from external IP
curl http://YOUR_IP:3000/api/health

# 5. Check Nginx/NPM logs
docker logs nginx-proxy-manager_app_1
Common causes:
- Application crashed on startup (check
pm2 logs) - Wrong port in ecosystem.config.cjs
- Health endpoint doesn't respond (check API route code)
- Firewall blocks port (check
ufw status)
4. Build Fails: "FATAL ERROR: Reached heap limit"
Symptoms: Next.js build crashes with memory error.
Solution:
# 1. Check available memory
free -h

# 2. Create swap file (if none)
sudo fallocate -l 2G /swapfile
sudo chmod 600 /swapfile
sudo mkswap /swapfile
sudo swapon /swapfile

# 3. Make swap permanent
echo '/swapfile none swap sw 0 0' | sudo tee -a /etc/fstab

# 4. Or increase heap for Node.js in package.json
"scripts": {
  "build": "NODE_OPTIONS='--max-old-space-size=2048' next build"
}
5. git pull Fails with Conflicts or Very Slow Deployment
Symptoms: Git complains about local changes or deployment takes > 10 minutes.
Solution:
# Option 1: Hard reset (removes all local changes)
ssh user@server "
  cd /var/www/app &&
  git fetch origin &&
  git reset --hard origin/main &&
  git clean -fd
"

# Option 2: Stash local changes
ssh user@server "
  cd /var/www/app &&
  git stash &&
  git pull origin main
"

# Option 3: If repository is large, use shallow clone
# During initial setup:
git clone --depth 1 https://gitlab.com/user/repo.git /var/www/app

# During deployment:
ssh user@server "
  cd /var/www/app &&
  git fetch --depth 1 &&
  git reset --hard origin/main
"
Useful Diagnostic Commands
# === PM2 ===
pm2 status                      # All processes status
pm2 logs app-name --lines 100   # Application logs
pm2 monit                       # Real-time monitoring
pm2 describe app-name           # Detailed information
pm2 reset app-name              # Reset restart counters

# === Port checking ===
sudo netstat -tlnp              # All listening ports
sudo lsof -i :3000              # Process on port 3000
nc -zv localhost 3000           # Check port availability

# === System logs ===
journalctl -u pm2-$USER -f      # PM2 systemd service logs
journalctl -u nginx -f          # Nginx logs (if not Docker)
tail -f /var/log/syslog         # System logs

# === Docker (for NPM) ===
docker ps                       # Running containers
docker logs <container> -f      # Container logs
docker exec -it <container> sh  # Enter container

# === Disk space ===
df -h                           # Free disk space
du -sh /var/www/*               # Directory sizes
du -sh node_modules .next       # Artifact sizes

# === Memory ===
free -h                         # Memory and swap
htop                            # Interactive monitoring
Conclusion
We've set up a complete CI/CD pipeline for a Next.js application with:
✅ Zero-downtime deployment via PM2 cluster mode
✅ Multi-environment setup (staging/production)
✅ Automated testing and health checks
✅ Secure secrets management via GitLab Variables
✅ Monitoring via PM2 and external services
✅ Rollback strategies for quick recovery
✅ Performance optimization (caching, artifacts)
✅ Nginx Proxy Manager for convenient domain management on single IP
This approach works in production: My personal website potapov.me is deployed exactly using this scheme. One external IP, server cluster, Nginx Proxy Manager for domain management, GitLab CI/CD for automatic deployment. Everything is stable and under full control — no dependencies on US services that can be blocked at any moment.
For Developers in Restricted Regions
It's especially important to have your own infrastructure when:
- Vercel/Netlify are blocked or work unstably
- Local alternatives with the same level of convenience don't exist yet
- Predictability and independence from external factors are needed
Self-hosted solution gives full control and confidence in application availability.
Next Steps
- Docker-ization — package application in Docker for reproducibility
- Database migrations — automate DB migrations in pipeline
- E2E tests — add Playwright/Cypress tests
- Performance budgets — limits on bundle size and Core Web Vitals
- CDN integration — serve static files via CloudFlare/BunnyCDN
Useful Links
Questions? Contact me on Telegram or via contact form.